Vibe coding: build JuStAI further yourself
JuStAI was built by vibe coding: describing what you want to an AI coding assistant, trying the result, and steering it with the next sentence, instead of typing every line yourself. The project is open source (AGPL-3.0), so you can do the same. You do not need to be a professional programmer. You need patience, curiosity and the habit of checking what the assistant produced.
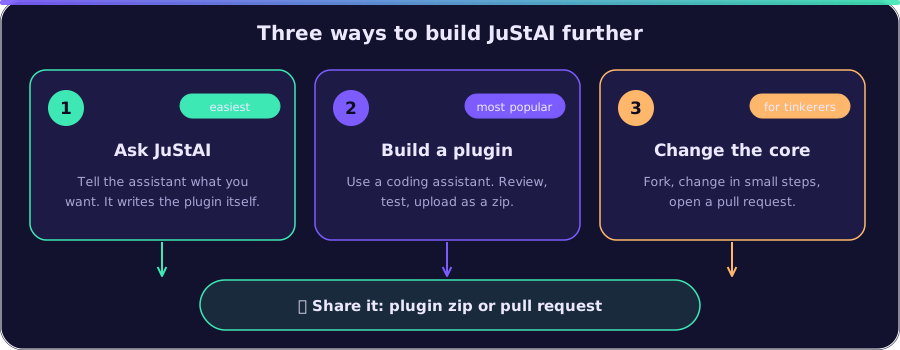
There are three ways to take part, from “no code at all” to “change the core”. Start at the first and go further only when you need to.
| Way | You need | Result |
|---|---|---|
| 1. Ask JuStAI itself | a running installation | a new tool or plugin, written by the assistant |
| 2. Build a plugin with a coding assistant | a computer with Python tooling and an AI coding assistant | a plugin you can zip and install |
| 3. Change the core | the full development setup | a new feature or fix, optionally a pull request |
1. Ask JuStAI itself
Section titled “1. Ask JuStAI itself”The simplest way: say or type what you miss. If no existing tool covers it, the assistant writes a plugin itself (“Build a plugin that tells me when electricity is cheaper than 20 cents.”). It generates the code and its tests, checks them statically, runs the tests in the sandbox and has the code reviewed. You then approve it in the admin interface under Tools. Details, limits and rollback: Self-developed plugins.
Good requests are concrete: what should trigger it (time, event, question), what should come out (spoken answer, display, event) and which data source it may use.
2. Build a plugin with a coding assistant
Section titled “2. Build a plugin with a coding assistant”Plugins are small: a folder with plugin.yaml (manifest), plugin.py and tests. That
makes them ideal for vibe coding. Everything that connects hardware, AI providers or
external services is a plugin (PLUGINS.md).
Set up
Section titled “Set up”You need Linux, uv and an AI coding assistant that can read and edit files in a folder (for example Claude Code, Cursor, GitHub Copilot or a similar tool).
git clone https://github.com/naxeu/justai.gitcd justaiuv sync --all-packagesLet the assistant learn the project first
Section titled “Let the assistant learn the project first”Before the first request, tell the assistant to read the relevant documents. A short
context file in the project folder (many assistants pick up CLAUDE.md or AGENTS.md
automatically) saves repeating yourself. A starting point:
# JuStAI – context for the coding assistant
- Read docs/PLUGINS.md and docs/DEVELOPMENT.md before changing anything.- New functionality is a plugin under plugins/<id>/ with plugin.yaml, plugin.py, tests/.  Use plugins/example-weather as the reference.- Code, comments, logs and tool descriptions are in English. Texts spoken without the AI  model go into backend/src/justai/i18n.py (en, de, it).- Request only the permissions the plugin really needs. Never log secrets; declare them in  secret_fields.- Every plugin needs tests with justai_sdk.testing.FakePluginContext.- Run before finishing: uv run ruff check . && uv run ruff format --check . and the  plugin's tests.
A first request
Section titled “A first request”Copy the example plugin and ask for your change. For example:
Create a new plugin
plugins/garbage-reminderbased onplugins/example-weather. It should offer a toolgarbage.nextthat tells which bin is collected next, using the collection dates in the plugin settings (config_schema). Add a job that announces it in the evening before collection throughservices.say. Write tests withFakePluginContextand request only the permissions it needs.
Then, in this order:
-
Read the manifest first. The
permissionslist is the most important part. Does the plugin ask for more than it needs? Ask the assistant to remove the rest. -
Run the tests and let the assistant fix failures:
Terminal window uv run pytest plugins/garbage-reminder/tests -
Run the quality checks:
Terminal window uv run ruff check plugins/garbage-reminderuv run ruff format --check plugins/garbage-reminder -
Install it: zip the plugin folder and upload it in the admin interface under Plugins → Install. Uploaded plugins always start as
untrusted(in the sandbox) and without permissions. You check and grant the permissions, fill in the settings and enable it (Distributing a plugin). -
Try it by voice or through the admin interface and tell the assistant what happened. Paste error messages and logs back into the conversation.
Plugins that need access to devices, the local network or AI providers (for example a new
camera driver) cannot run in the sandbox. Those are trusted plugins in the core process;
read Permissions first and review such code especially
carefully.
3. Change the core
Section titled “3. Change the core”For new modules, API routes, interface changes or fixes in the core.
Set up the development environment
Section titled “Set up the development environment”Follow DEVELOPMENT.md: Docker, uv and Node 22. The recommended development mode reloads the backend and the interface on every change:
docker compose -f docker-compose.yml -f docker-compose.dev.yml up --buildThe interface is then on http://localhost:5173.
Work in small steps
Section titled “Work in small steps”-
Fork the repository on GitHub, clone your fork and create a branch for your idea.
-
Describe the goal and the boundaries to the assistant: which module, what must not change, which tests should prove it. Point it to ARCHITECTURE.md and the document of the area you touch (for example AUDIO.md or ROOMS.md).
-
Ask for tests first or together with the change. Domain logic without I/O (for example
output/router.py) is easy to test; see TESTING.md. -
Commit after every working step so you can always go back.
-
Run the checks before you finish:
Terminal window uv run ruff check .uv run ruff format --check .(cd backend && uv run mypy src)uv run pytest backend/tests/unit(cd frontend && npm run lint && npm run typecheck) -
Update the documentation when behaviour changes, in English and German. New interface texts go into
en.ts,de.tsandit.ts; the build fails if a key is missing. -
Open a pull request with a short description: what changed, why, and how you tested it (also what you could not test, for example because you had no camera).
The conventions the assistant must follow are in DEVELOPMENT.md. Putting them into the context file shown above makes the results much better.
Tips for good vibe coding
Section titled “Tips for good vibe coding”- Small steps beat big prompts. One feature, one commit.
- Let the assistant read before it writes. Name the files and documents it should look at.
- Ask for an explanation of anything you do not understand, and for a review of its own change (“what could go wrong, what did you not test?”).
- Test with the simulator. The driver
simulatedprovides a simulated camera, microphone and speaker, so you can try voice features without hardware (DEVICES.md). - Be honest about what is tested. The project says openly which parts were checked with real hardware (TESTING.md). Do the same in your pull request.
- Keep secrets out of chat and commits. API keys belong into
.envor the plugin settings, never into prompts, code or the repository. - You stay responsible. The assistant can be wrong and confident at the same time. Read what runs in your home, especially code that has access to cameras, microphones or the network.
Questions, bugs and ideas
Section titled “Questions, bugs and ideas”Everything happens on GitHub in the JuStAI repository:
| I want to… | Where |
|---|---|
| ask a question, show what I built, talk about ideas | Discussions |
| report a bug | Issues → Bug report |
| suggest a feature | Issues → Feature request |
| fix or build something myself | a pull request (see the three ways above) |
Bugs and feature requests are collected as issues. For a bug please say what you did, what you expected, what happened, your hardware (for example the camera model) and, if possible, the log lines. Never post passwords, API keys or camera addresses with credentials. English and German are both welcome.
Licence
Section titled “Licence”JuStAI is licensed under the AGPL-3.0: you may use, change and distribute it,
and whoever offers a changed version as a network service must publish the source of the
changes under the same licence. The plugin SDK (sdk/python) is MIT-licensed so that your
plugins can use any licence. See the licence section in the
README.